Last episode we took an initial look at OS X-only configuration options available in Profile Manager. This week we’ll finish looking at options for configuring OS X devices with Profile Manager.
Reminder: These exercises require that you have a device enrolled in Profile Manager. If you’ve un-enrolled your device, go back to
Enrolling and Managing Devices to get a device added to Profile Manager.
Directory payload
One of the benefits of using Profile Manager is automatically binding your device to your Directory Server, whether that server is a Mac running
Open Directory or a Windows server running Active Directory. Since we already have a server running Open Directory in our network (Ahem…that’s the same Mac that’s running Profile Manager), we’ll automatically bind your enrolled device to the Open Directory server.
First, let’s have a look at our device and make sure it isn’t already bound to your Profile Manager server or any other server.
On your managed Mac, open System Preferences.
Click the Users & Groups preference.
Click the lock and authenticate as an administrative user.
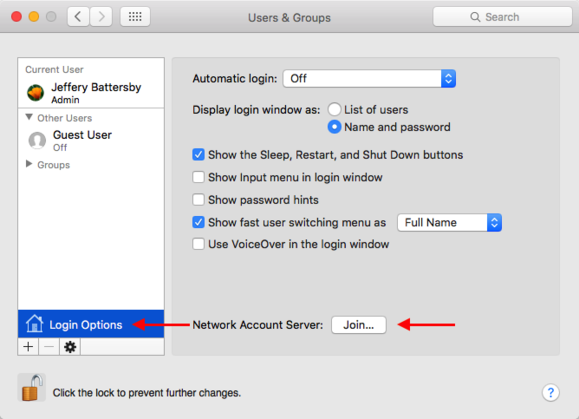
Click Login Options at the bottom of the user account list.
Verify that there is only a Join button and no information about a connected network server listed.
If there is a server listed:
Click the Edit button.
Select the server from the list of bound servers.
Click the “-“ button.
Click the button that says Stop Using Server.
Click the Done button.
Leave the Users & Groups Login Options preference open and visible as you complete the next few steps.
Connect and login to your Profile Manager server: http://yourserver.yourdomain.com/profilemanager
Select Devices in the Profile Manager sidebar.
Select your enrolled device from the device list.
Click the Settings tab and click the Edit button.
Scroll down the the OS X-only payloads and select the Directory payload.
Click the Configure button.
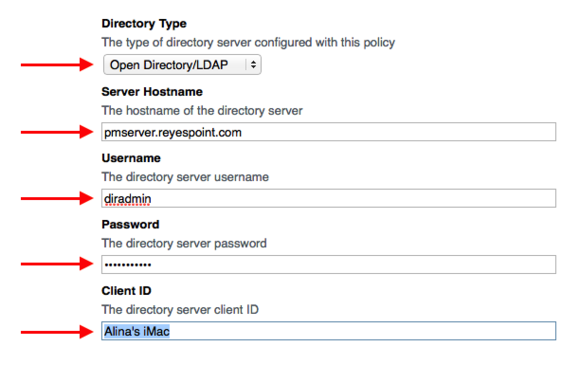
Choose Open Directory/LDAP for Directory Type.
Enter the fully qualified domain name for your Profile Manager server.Optionally:
Enter your directory administrator userid.
Enter the directory administrator’s password.
Enter a Client ID for the device.Note: These optional steps would be required if you were binding to an Active Directory server.Keep an eye on the Users & Groups preference window as you perform the next steps.
Click OK.
Click Save.
Note that, after a few seconds, your Mac is now bound to your Profile Manager server.
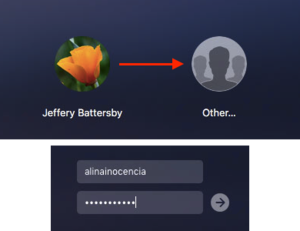
Depending on your login window settings, you should see either a list of users or name and password fields. If you see a list, click Other, then enter a user id and password you created in Add Users, Enable Device Management. A new Home Folder for this user will be created in your Users folder, after which you will be logged in and you should see this user’s Desktop.
Log out.
Energy Saver payload
The Energy Saver payload lets you define settings for when computers should sleep, whether they should restart after a power failure, and offers specific settings for desktop and portable devices. But you can also use this payload to make sure computers are turned off at night and turned back on again before employees arrive for work in the morning. For now we’ll create a payload that shuts your computer down at a specific time.
Open Profile Manager.
Select your device from the Profile Manager sidebar.
Select the Energy Saver payload.
Click the Configure button.
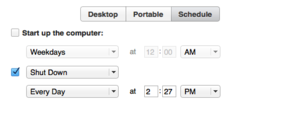
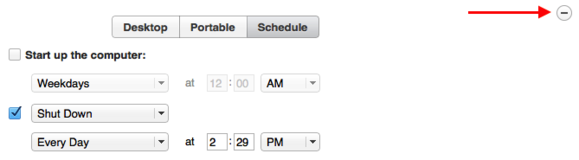
Click the Schedule tab.
Put a check in the second check box.
Change the menu to Shut Down.
Change the schedule menu to Every Day.
Set the time for shut down to two minutes into your future. (i.e., if your current time is 2:23 p.m., set the time to 2:25 p.m.)
Click Okay.
Click Save.
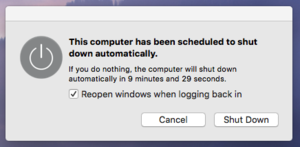
Wait.When the clock strikes the time you entered in the shut down field, you’ll see a message about a scheduled shut down.
Click the cancel button.
Open Profile Manager and edit the device payload.
Select the Energy Saver payload.
Click the “-“ that appears at the upper-right-hand side of the Energy Saver payload.
Click OK.
Click Save.
Clicking that minus sign removes the payload from your device, so your Mac will no longer shut down.
What’s next
We’ve played quite a bit with these settings over the last several lessons and, by now, you should be able to create some pretty sophisticated settings for your Mac. Play a little bit on your own, that is, if you haven’t done that already. Create your own configuration that uses advantage of several of these payloads at a time.