Before you can begin using the NetInstall service you need to make sure you have a few basics in place. Unlike setting up Profile Manager, we don’t need to worry about certificates, or Open Directory, or user accounts. In fact, you really don’t need to do much more than switch this service on and it just works. But there are a few things you need to make sure you have in place before you get started, otherwise you may discover that what should have been a boon turns out to be a boondoggle.
What are the basic requirements?
- ethernet
- high-speed network switch
- DHCP
Network
The NetInstall service requires high-speed networking in order to work properly, which means an ethernet network with your server and all the clients you plan to image connected to that network.
Nope, Wi-Fi is not supported.
If the computer you’re running Server on has no ethernet port you will not be able to use the NetInstall Service. You won’t even be able to turn it on. (You can enable the service as soon as you add any ethernet connector using Thunderbolt or USB.) You can, however, attempt to connect to the NetInstall service on a client computer that’s only using Wi-Fi, but this isn’t an option supported by Apple and it may offer up more heartache than joy. But, if that’s all you’ve got at the moment, give it a go. Just make sure, when you roll this out for real, that all the devices you’re imaging have an ethernet connection.
How fast does that ethernet network need to be?
First, a switched network is a requirement. You cannot use an ethernet hub that isn’t switched. It will be too slow.
If you have a 100Base-T switched ethernet network you will be able to support up to 50 simultaneous devices using the NetInstall service.
If you have a 1000Base-T switched ethernet network you’ll be able to support 50 or more simultaneous devices.
DHCP
If you’re running a network of any sort you probably already have a DHCP server. DHCP, aka Dynamic Host Configuration Protocol, is the way your computer gets an IP address on your network, which is what allows your computer to communicate with other computers on your network or anywhere else in the world.
It would be surprising if you didn’t have a DHCP service running in your network, but if you’re in an odd situation where you don’t, then you’ll need to have one before you can begin using the NetInstall service. In short: no DHCP, no NetInstall.
It’s important to note that you should only ever have one DHCP server running in your network. You should work under the assumption that you already have one. If you’re certain you don’t have a DHCP server set up, perform the following steps to set up DHCP on your server.
Remember: Do not do this on a network where you already have a DHCP server.
- Open the Server app on your server.
- Locate the Advanced section near the bottom of the Server sidebar.
- Select the DHCP service.
- You should already see one interface set up for DHCP, if you do:
- Double-click the interface
- Set the lease duration to 1 hour
- Set the Network Interface to ethernet
- Choose a starting IP address
- Choose an ending IP address
- Enter an appropriate subnet mask
- Enter a router address
- If you do not see a DHCP interface set up already:
- Click the + button that appears below the Networks window
- Give your network a name
- Set the lease duration to 1 hour
- Set the Network Interface to ethernet
- Choose a starting IP address
- Choose an ending IP address
- Enter an appropriate subnet mask
- Enter a router addressYou will not need to enter any DNS information for the purposes of these exercises, but if you plan on using DCHP for other devices in your network, you will need to enter DNS information. When you’re done your settings should look something like this:
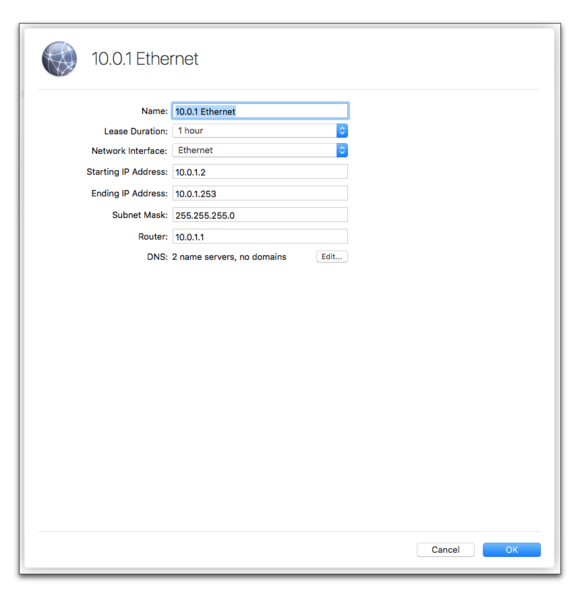
- Click OK.
- Turn the DHCP service on.

Next: We’ll begin looking at how the NetInstall service works.