This is the last episode on the NetInstall service, which will let us connect to a network home folder that the user can customize to their liking, using a NetBoot image that they can’t change at all.
To get started with this final ep you’ll need the disk image you created in episode 6 and an external disk to restore the image to.
Creating a fresh OS install
For NetBoot to work the way we need it to we first need to have a bootable disk with a single administrative user account that can be used as the basis for everything to come.
To create this image:
- Open the Disk Utility app in your /Applications/Utilities folder.
- Make sure you’ve plugged your external hard drive into your Mac.
- Double-click the disk image you created in episode 6.
- Select the external disk in Disk Utility.
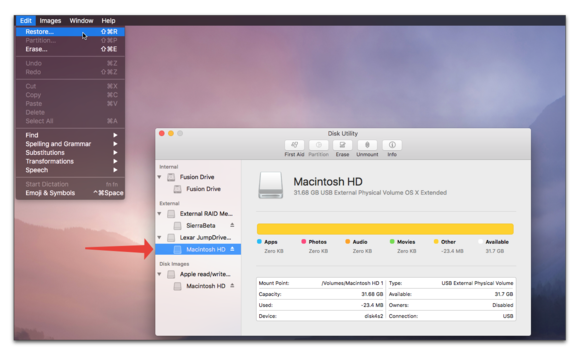
- Click the Edit menu and select Restore.
- Choose the disk image you created in episode 6 from the “Restore from” menu.
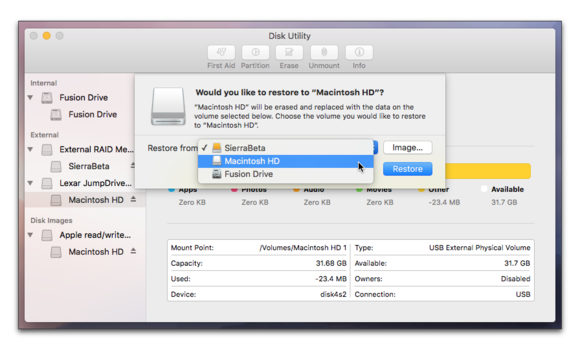
- Click Restore. When the restore is complete…
- Restart your Mac using your external image. You can do this either by selecting the disk in the Startup Disk preference in System Preferences or by restarting your Mac while holding down the Option key and selecting the drive you restored the image to.


When your Mac starts up, go through the setup process and create an initial administrative account. Do not migrate any user accounts or add any Apple IDs. Only create the initial account.
When you’re done, restart your Mac normally.
Creating a NetBoot image linked to your Open Directory domain
In order to automatically bind your NetBoot image to your Open Directory server you’ll need create your new NetBoot image using a Mac that’s already bound to your server. You can do this on the server yo set up last week or by binding another Mac to the server. For our purposes we’ll create the image using the System Image Utility on the server.
- Plug the image you just set up with an administrative account into your server.
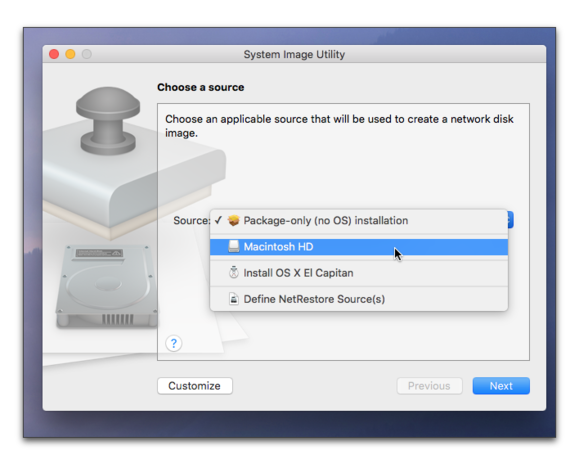
- Open the System Image Utility.
- Select the disk you created in the previous section from the Source menu and click Next.
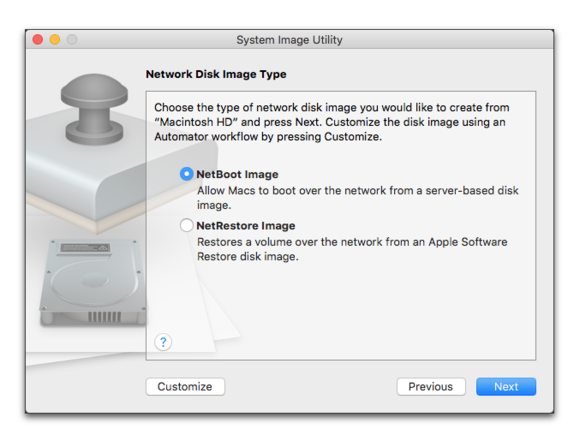
- Select NetBoot Image in the NetWork Disk Image Type window and click Next.
- Agree to the software license agreement.
- Click Next without adding any configuration files, packages, or post-install scripts.
- Click Next without changing any settings at the System Configuration window.
- Click the + button in the Directory Servers window.
- Click the Server menu and select your server from the list.
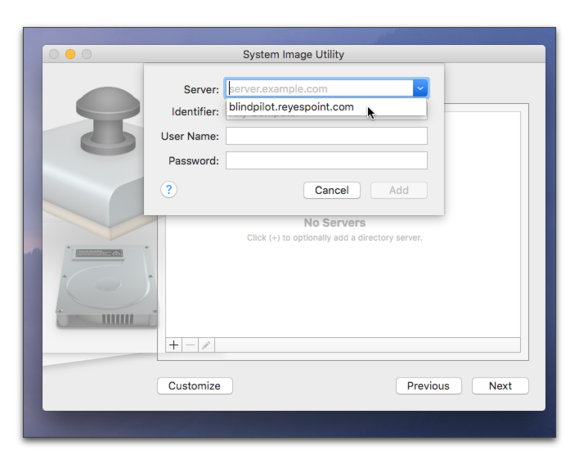
- Tap the top of the Identifier field, but do not enter any information in the Identifier, User Name, and Password fields.
- Click the Add button.
- Click Next.
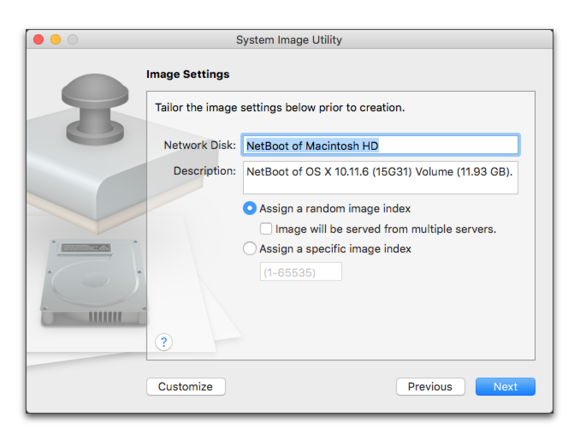
- Give your network disk a name and description, then click the Next button.
- Click Next at the Supported Computer Models window.
- Give your image a name.
- When the image creation is complete, move it to your server’s /Library/Netboot/NetBootSP0 folder.
- Open the Server app and make sure your new image is enabled for use.


Start a Mac using your new image and a network user account
You already know how to start your Mac up from a network image, so start your Mac using your new NetBoot image.
When you see the log in window, select the Other option and enter the name and password for the user you created in the previous lesson.
When you log in, note that your “hard drive” is still based on the NetBoot Image, but your user’s home folder is stored on the Network Homes you created on your server in the previous lesson.
To check the location of your user’s Home Folder, open your user’s Documents folder then Command-click documents in the title bar of the resulting Finder window. You should see the path to the Documents folder goes back to Network Homes on your server.
As a final step, change the Dock location for your users, then log out. Once the logout is complete, restart your computer, just like we did last time, and log back in using your network user account. Note that the Dock still appears on the same location it was when you logged out.