In this tutorial, we will show you how to use your iPhone camera’s level feature to guide horizon placement in your photographs and perfectly align overhead and top-down shots.
Your iPhone Camera app has a built-in leveler that takes advantage of the built-in accelerometer and gyroscope sensors to determine if you’re holding the device leveled properly.
So, when taking pictures of food on a table from an overhead position, pictures of ceilings when visiting monuments, or capturing something at a distance in front of you, the level feature will significantly help straighten and compose your shot.
Best of all, the level tool kicks in automatically when you hold your phone appropriately to capture a moment.
Turn on the camera level feature on iPhone
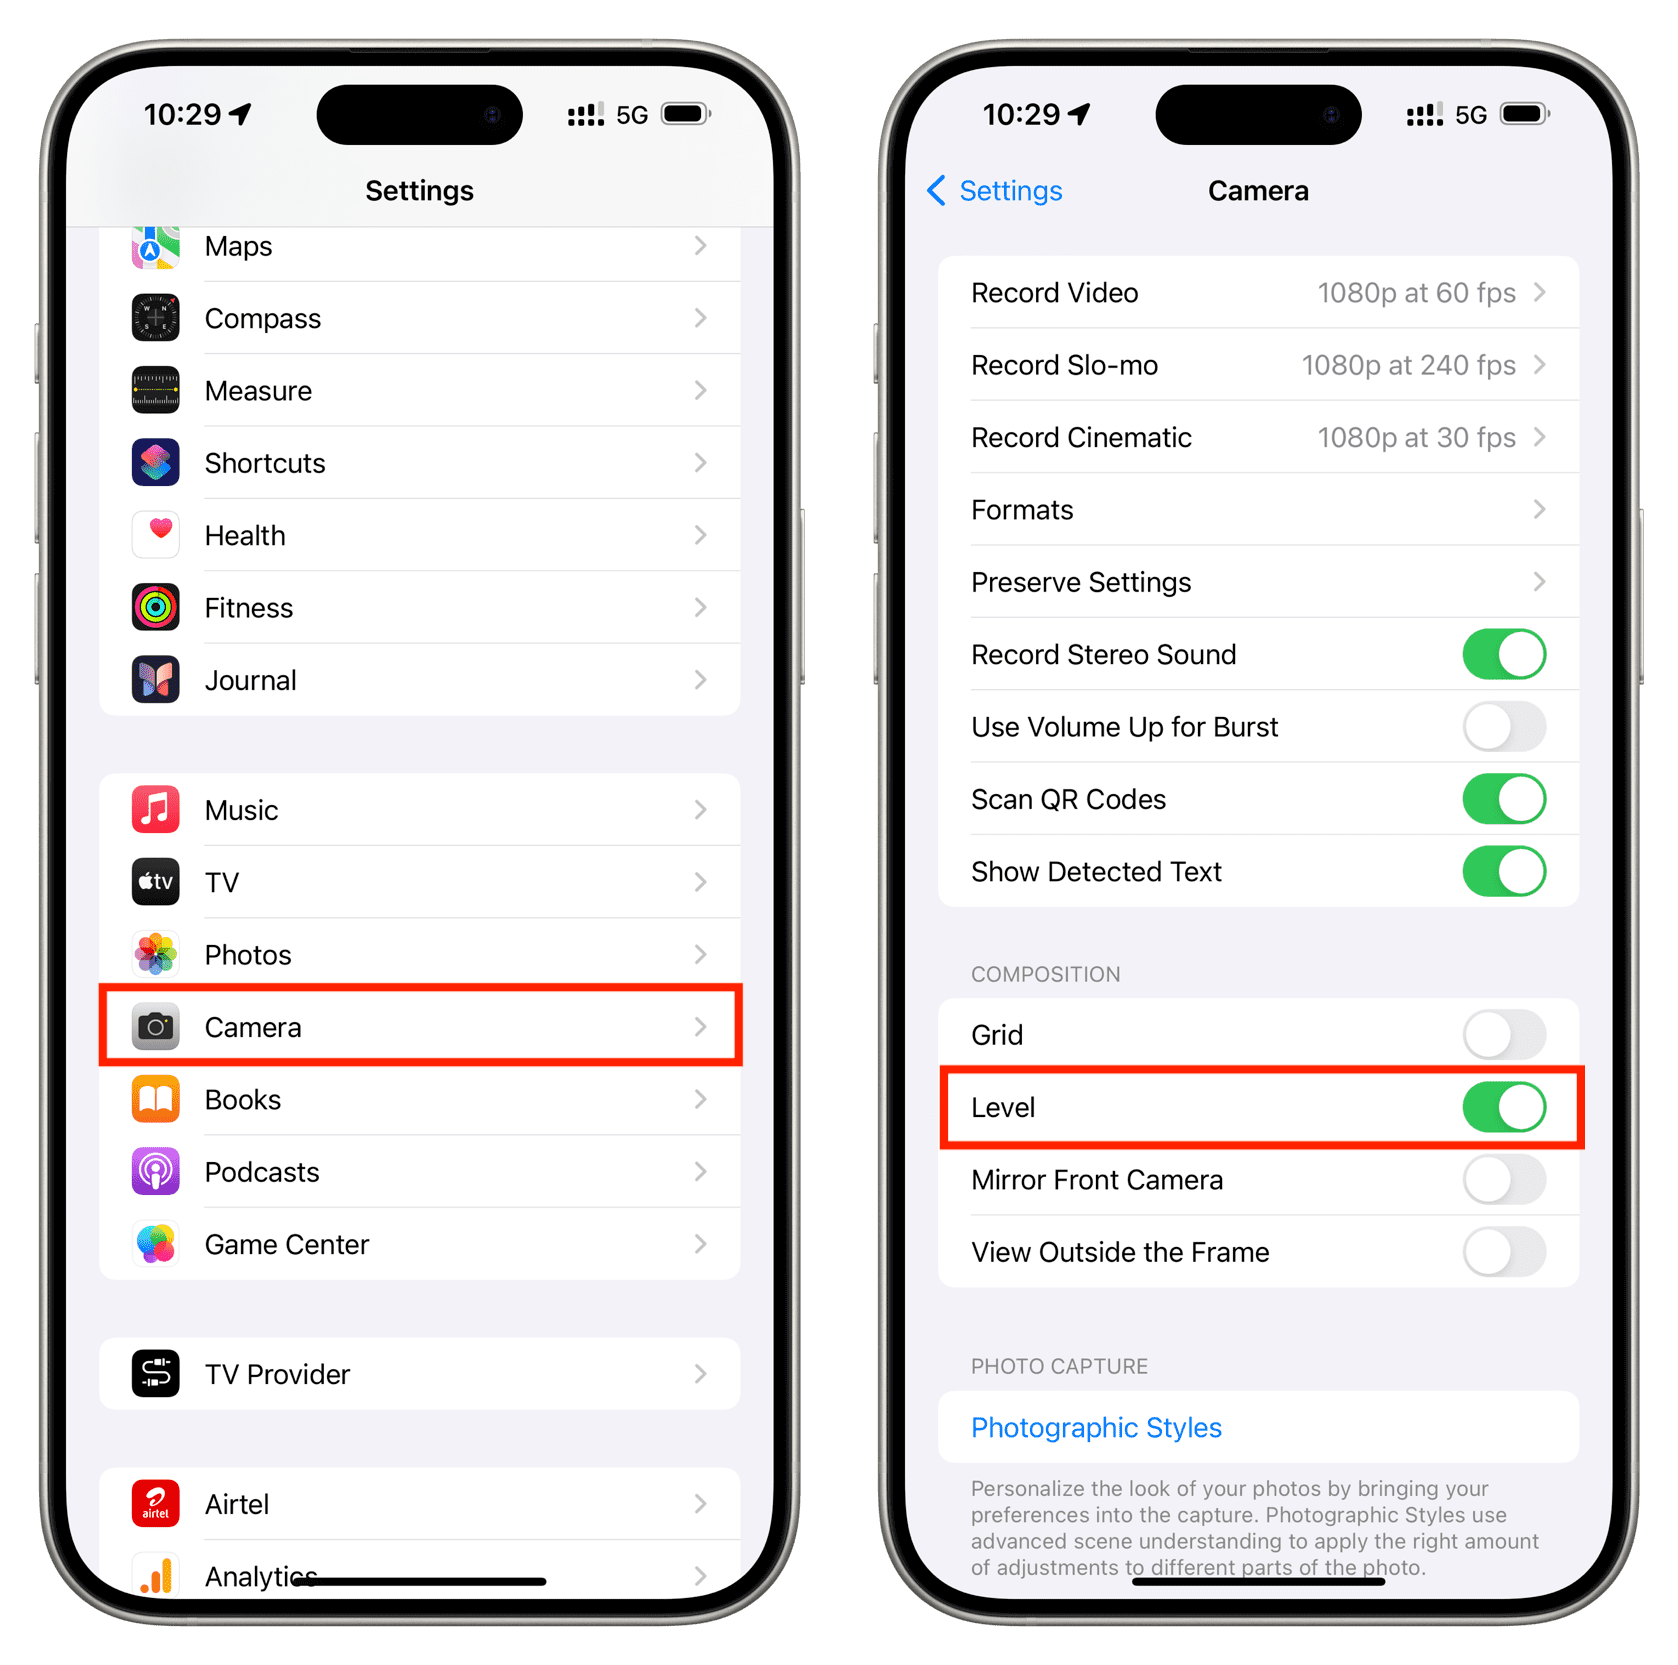
- Open the Settings app on your iPhone or iPad.
- Scroll down and tap the Camera option.
- Turn on the Level option under the Composition heading.
Use the iPhone’s camera level for horizon alignment
To align the iPhone’s camera with the horizon line, tilt your device until the broken lines in the viewfinder reconnect and turn into a single straight yellow line.
Congratulations, the camera is now perfectly aligned with the horizon. Hit that shutter button before you’re out of level again!
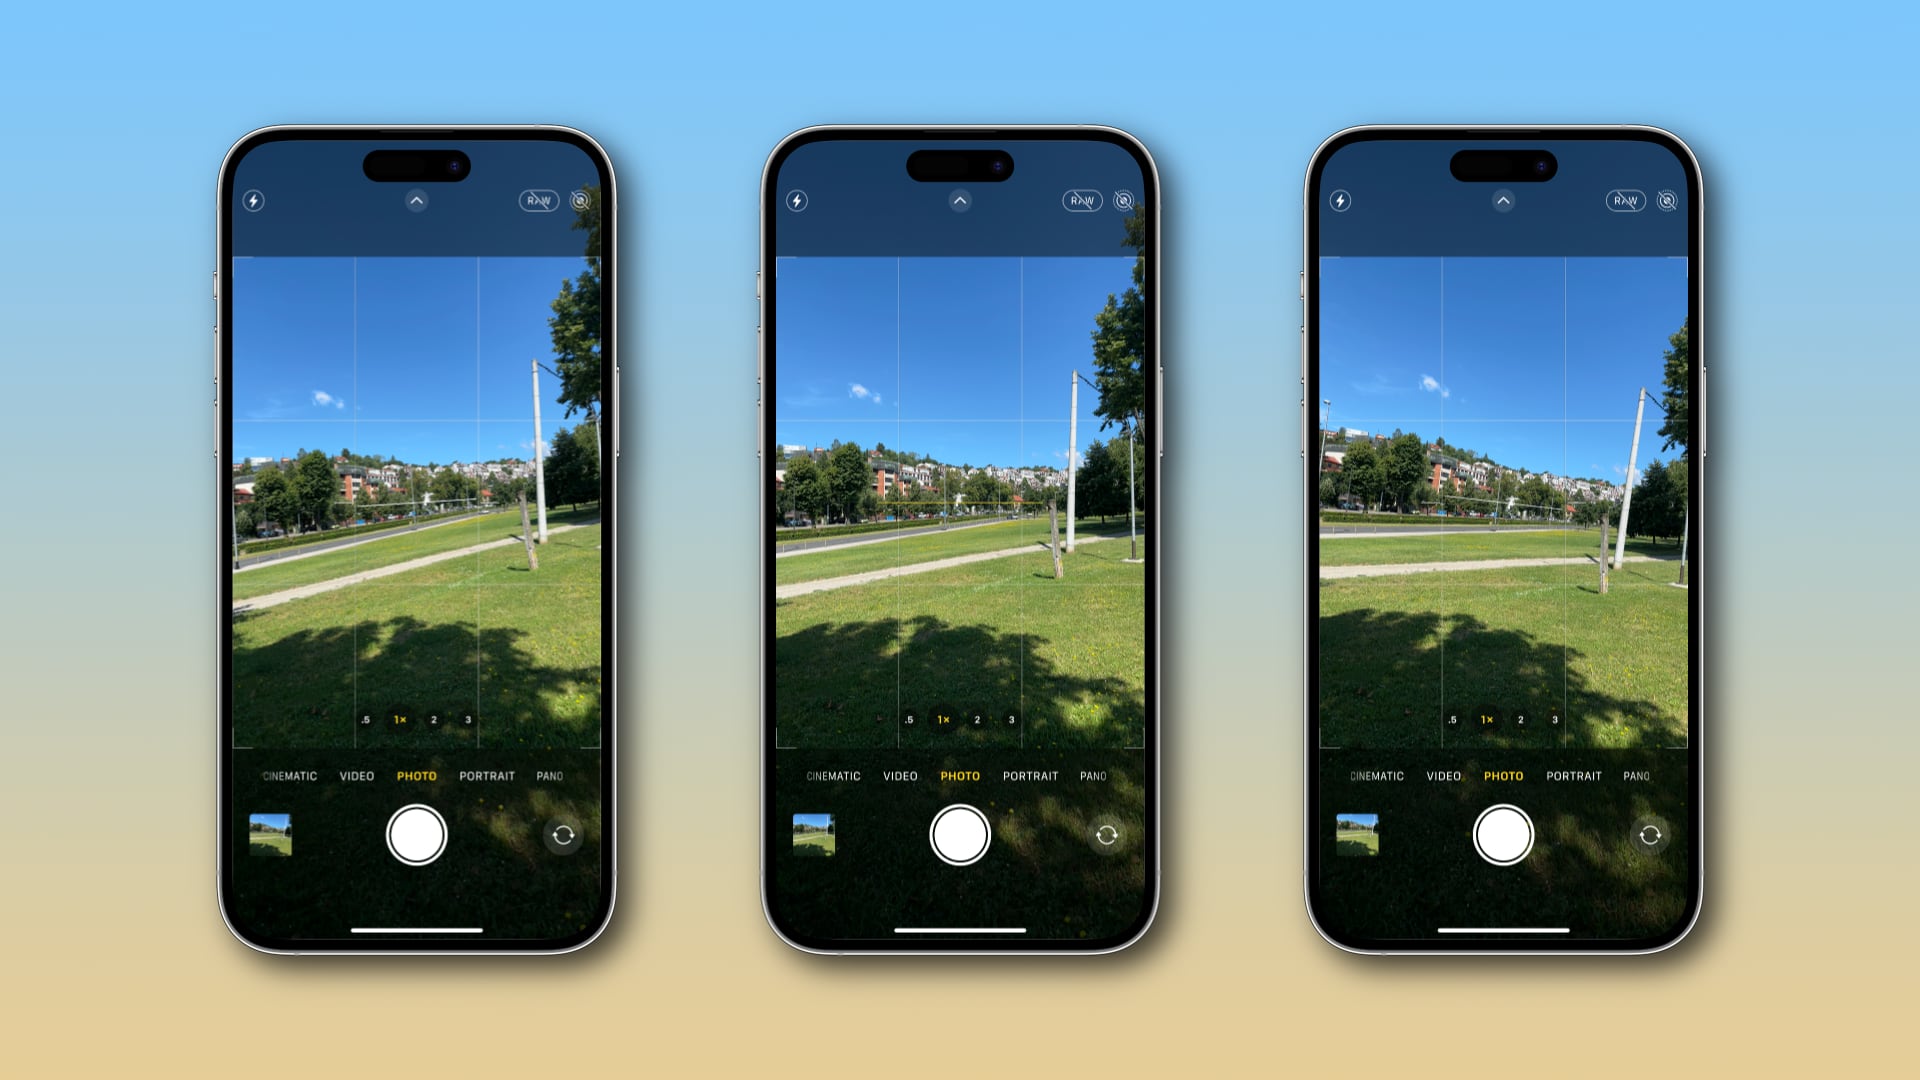
The camera level works on any iPhone camera in both portrait and landscape, but you won’t see it at sharp angles as it’s limited to low angles close to horizontal.
The new horizontal level in iOS 17 is available across all shooting modes except for panoramic photography.
Use the iPhone’s camera level to take perfectly aligned overhead and top-down photos
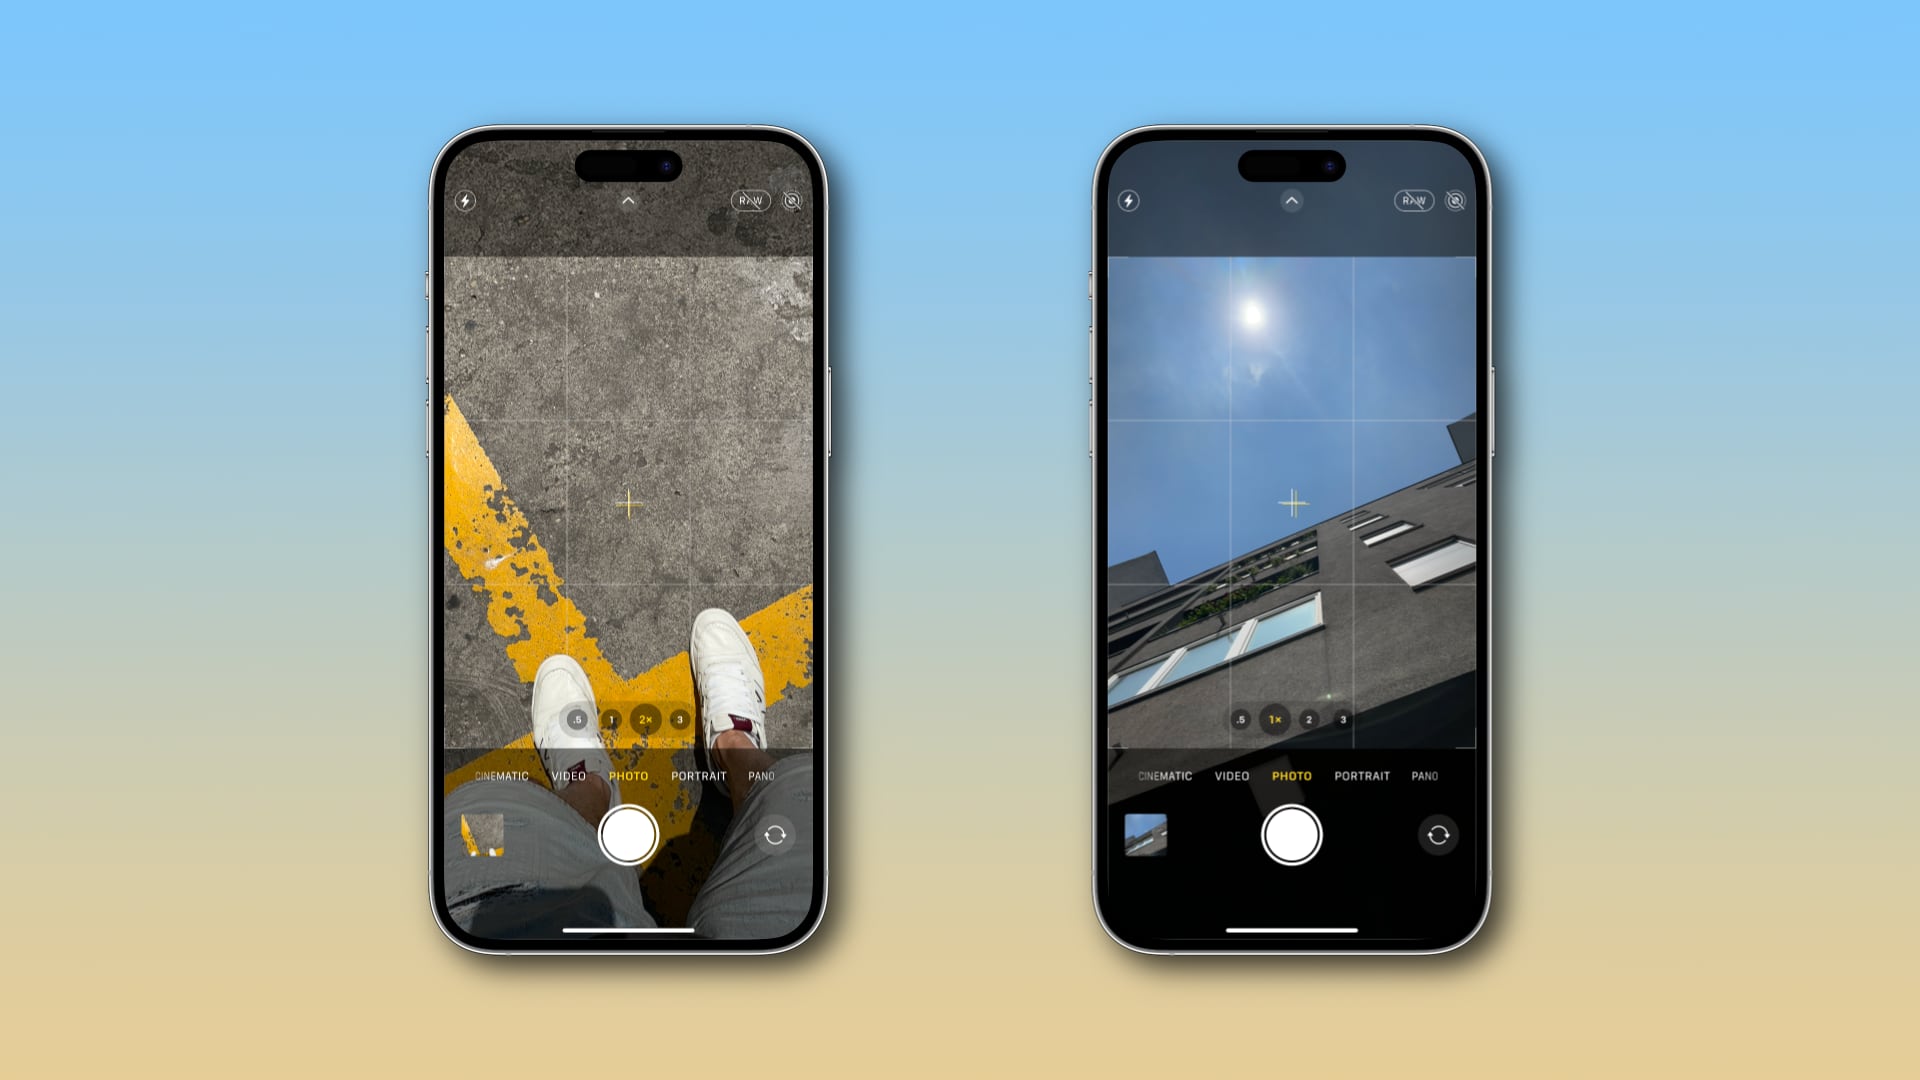
Aside from the horizontal level, your iPhone also has a hidden vertical level that can be used in Photo, Portrait, and Time-Lapse modes.
A pair of crosshairs show up in the viewfinder when shooting things directly above you, like the sky, or below you, such as your food. The vertical level guides your alignment so you can take balanced shots without a tripod arm or mount.
The shot is perfectly aligned when the two crosshairs overlap and turn yellow, and your iPhone subtly vibrates. Hit the shutter button and admire your perfectly balanced photograph!
Align those lines!
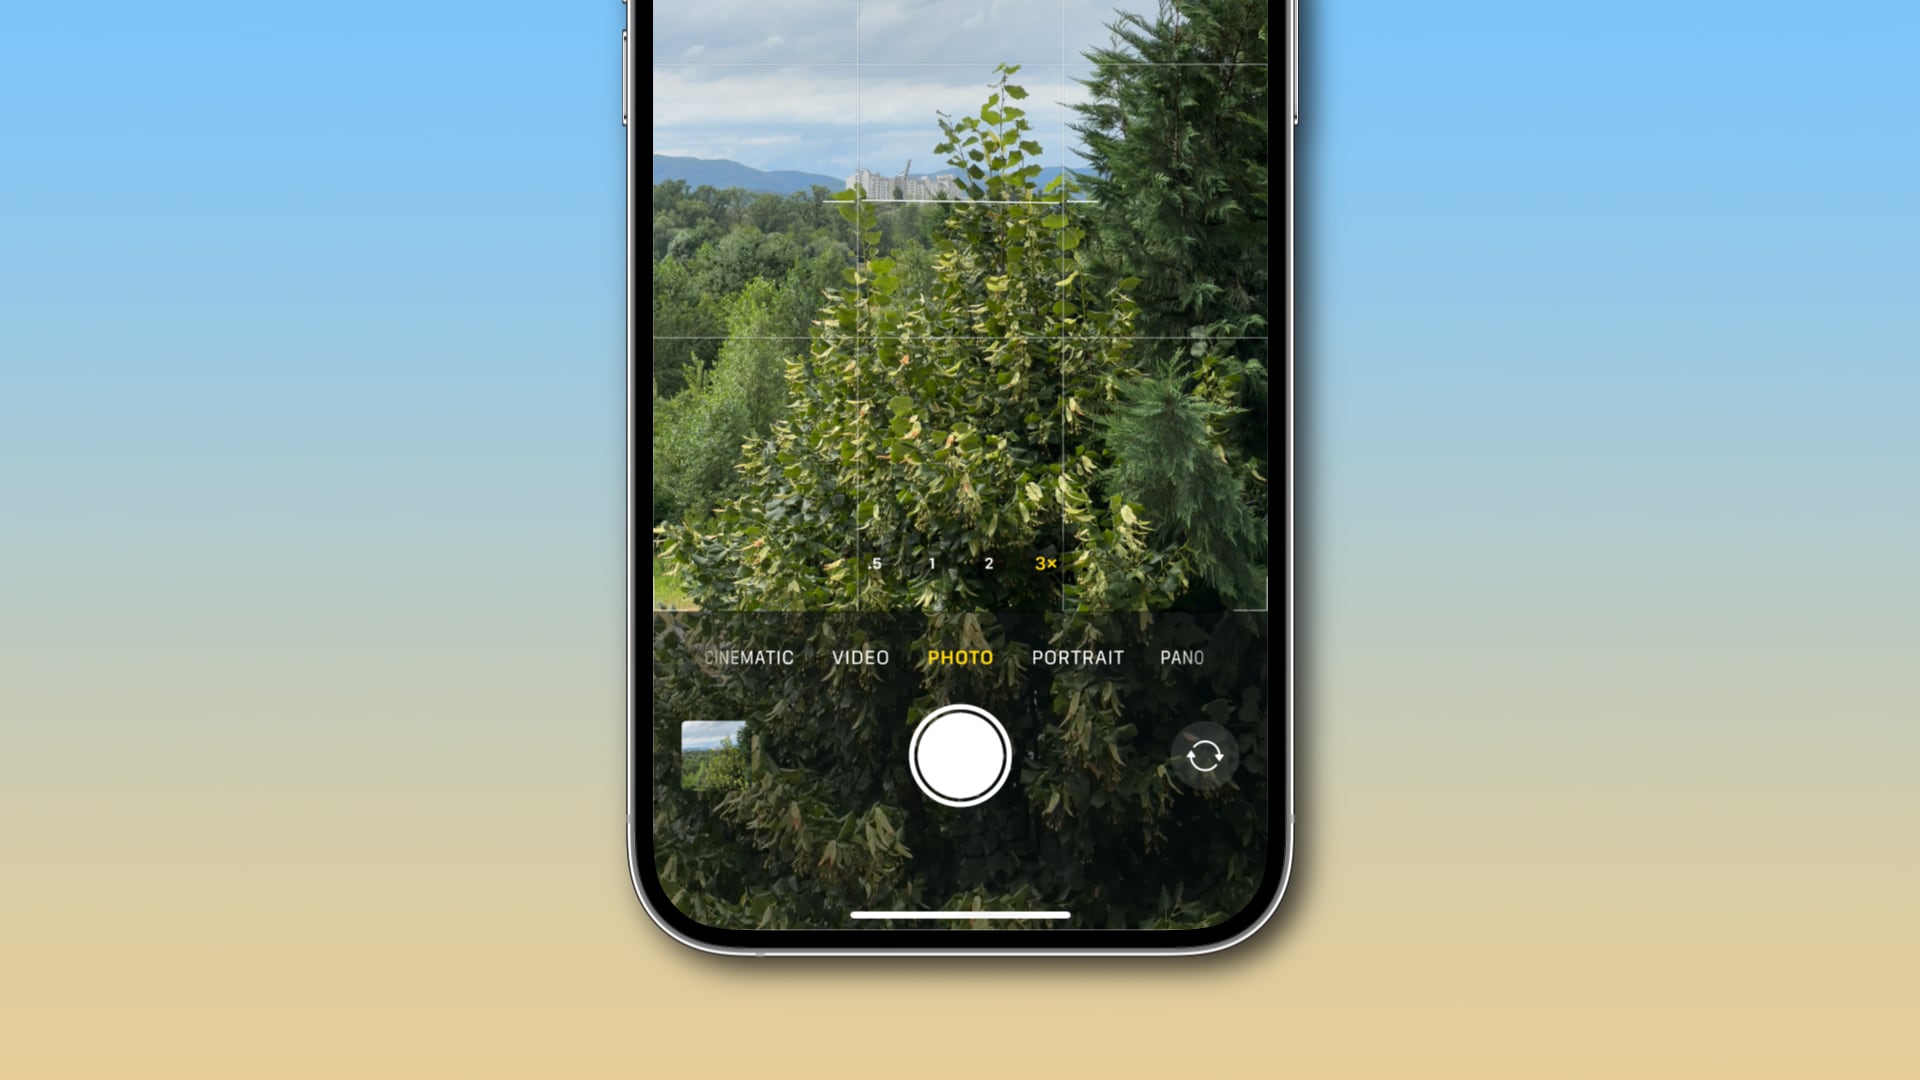
Whether you’re new to iPhone photography or not, the grid can help you apply the Rule of Thirds, even though some people use it to guide the placement of the horizon in their photos. You can turn the camera grid on or off within the Composition section in Settings > Camera > Grid.
You can also use the grid to align the horizon, but the problem with that is precision. Grid lines are just that—lines. They don’t respond to movement like the level feature, which takes advantage of the iPhone’s accelerometer and gyroscope sensors to detect the slightest changes in the camera’s position across all three axes.
Unfortunately, Apple keeps the level feature turned off by default to avoid overwhelming the Camera app’s interface, but it should be enabled out of the box if you ask me. Doing so would ensure everyone could easily adjust their shooting angle and perspective without necessarily knowing this option exists.