


How to Uninstall iTunes in Mac OS X

iTunes is arguably the most important application Apple has ever released, and is installed on hundreds of millions of Macs and PCs around the world. Although no longer necessary for the use of iOS devices, iTunes is still an important portal for managing, purchasing, and enjoying digital media. But some users just don’t like iTunes, and prefer to use other media software like VLC, Fidelia, or Vox. For these users, it’s easy to uninstall iTunes in Windows, but a bit trickier for those running OS X. Don’t fret, however, as there’s a relatively simple workaround. Here’s how to uninstall iTunes in Mac OS X.

Unlike Windows, iTunes comes preinstalled as part of OS X, and is considered “required” software by operating system. If you therefore try to simply drag the iTunes application file to the Trash, the system will stop you and present a warning message.
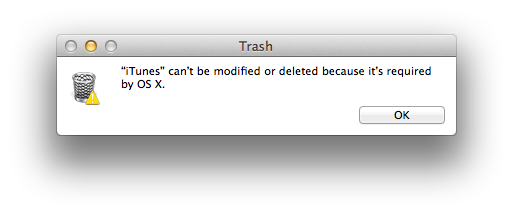
The warning is a bit exaggerated, of course. iTunes isn’t required for the basic operation of OS X. Sure, you might need to play media files from time to time, but QuickTime (which is unaffected by the steps presented in this article) can handle any playback needs.
To disregard OS X’s warning and uninstall iTunes, navigate to the Applications folder and find the iTunes app file (/Applications/iTunes.app). Right-click (or Control-click) on iTunes and select Get Info. Locate and click on the padlock icon on the bottom right side of the window and enter your admin password. This is necessary in order to make changes to the app’s permission settings.
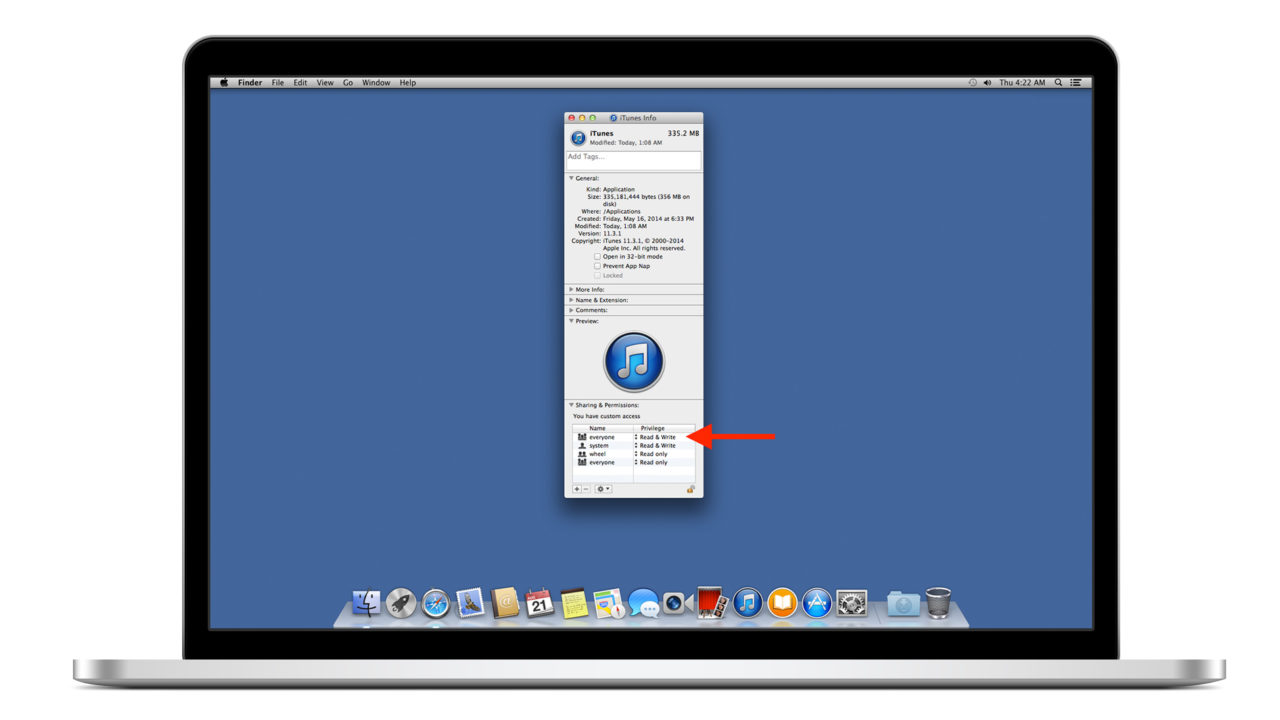
Next, expand the Sharing & Permissions section of the window if it’s not already visible and change the privileges for “everyone” to Read & Write. This will give us complete control of the iTunes application so that we can override the operating system’s warning and delete it.
Close the Get Info window and try again to drag the iTunes application file to the Trash. This time, there’s no warning, and the file is immediately trashed. Empty the Trash to complete the process.
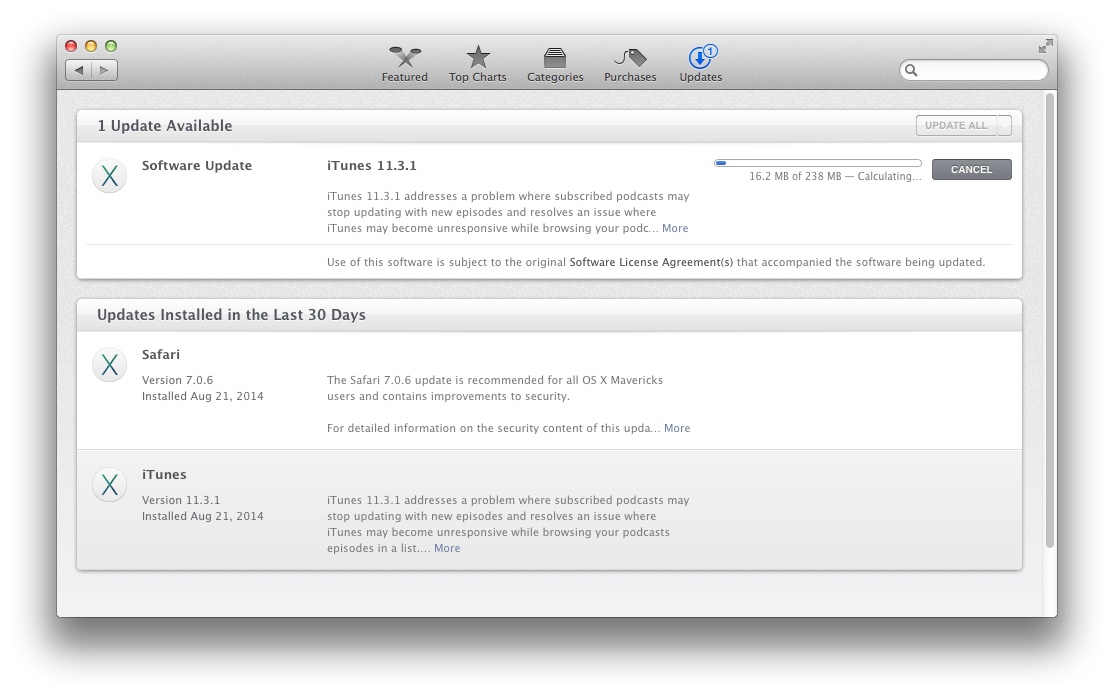
iTunes is now no longer installed on your Mac, and you’re free to install and use the third-party media software of your choice. If you wish to reinstall iTunes, just launch the Mac App Store’s Software Update section (or the old standalone Software Update if you’re running a version of OS X prior to Mountain Lion). With iTunes absent from your hard drive, Software Update will automatically offer to install it for you again. Alternatively, you can manually download and launch the iTunes installer from Apple’s website.
It should be noted that the steps discussed here do not affect your iTunes library file or your actual iTunes media, both of which are stored outside of the application file we deleted. This means that if you later reinstall iTunes, you can point it to your old iTunes library and pick up right where you left off. It also means, however, that if your goal is to scrub all vestiges of iTunes from your Mac — including your library and media files — you’ll need to find and delete those files as well, which are located by default in the user’s Music folder.


20 thoughts on “How to Uninstall iTunes in Mac OS X”
I wanted to go back to 12.6.2 so I can still d/l stuff to my ipod without use of WIFI.
WIFI gives me a headache so it is banished from the house.
it took up 350 MB on my tiny 64GB ssd!
killall -9 iTunesHelper
rm -rf /Library/iTunes
rm -rf /Users/yourusername/Library/Preferences/*iTunes*
rm -rf /Users/yourusername/Library/Caches/*iTunes*
rm -rf /Users/yourusername/Library/*iTunes*
Then, and the this is magic to stop it coming back:
* Open System Preferences
* Go to Software Update
* Open App Store preference
* Untick EVERYTHING except ‘Automatically check for updates’
Having spent a good couple of hours with 2nd line support, there is no current way to prevent App Store telling you about the update (the ‘Hide Updates’ option doesn’t work for iTunes) but this is as close as you can get.
Don’t forget – you’ll need to manually install all updates from now on (not as big a headache as might think).
Some people may have to “sudo” your above suggested commands in terminal.
for example:
sudo rm -rf /Library/iTunes
Am I the only one that hates iTunes? … I don’t even want the *installer* on my machine.
Thanks for your pointers, Justin.
Well, that’s french… what shall I do with this module libgnsdk_dsp.3.06.0.dylib? Any tip? With all the Apple gadgets in the house its hard not to iMatch…
MacBook (2008) / Mac OS X 10.7.5 / iTunes 12.0.1.26 / iTunes Library 91Go (heavy!)
Thanks et bon matin.
I can see this happening: rm -fr / Applications/iTunes.app
;)