How to Remove Red Eye from Photos on iPhone & iPad
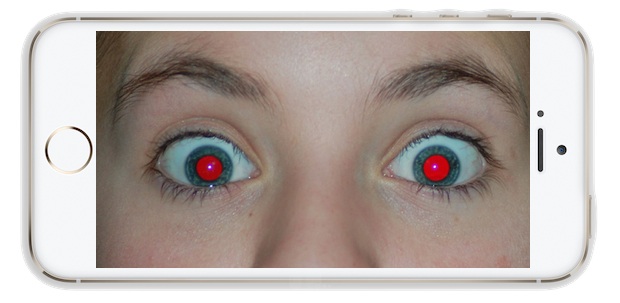
Red Eye happens sometimes in photography, often if you’re shooting a subject while using the camera flash, or when a bright light is shining in their eyes. The appearance is striking and usually undesirable, with the subjects eyes literally glowing red. You may run into the red eye effect when taking pictures with any camera, but the iPhone, iPod touch, and iPad all have a fantastic trick up their sleeve that lets you quickly remove red eye from just about any picture.
To use the native red eye removal tool, you’ll need to be running modern version of iOS versioned anywhere at or above 7.0, other than a newish versions of iOS, no additional downloads or apps are needed. The feature is part of the editing tools in the Photos app, and though you can certainly use it to remove red eye from any picture taken with the iPhone camera, you can also use the same tool on any picture provided to the iOS device too.
How to Remove Red Eye Effect from Pictures with iPhone, iPad, & iPod touch
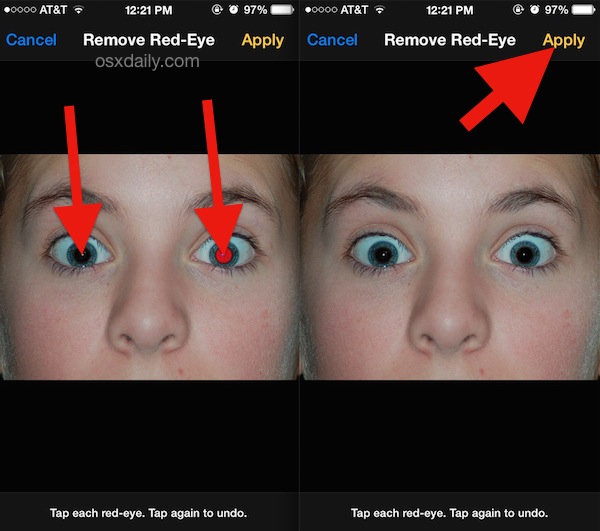
- Go to the Photos app and tap on the picture that has the red eye effect you wish to fix
- Tap on the photo and then tap on the “Edit” button
- Tap the little eye icon with a slash through it (this is the red eye removal tool button)
- Tap directly onto the red eyes in the photo you want to fix and remove, choose one at a time
- When finished correcting all red-eye and satisfied with the result, tap on “Apply” to save the change

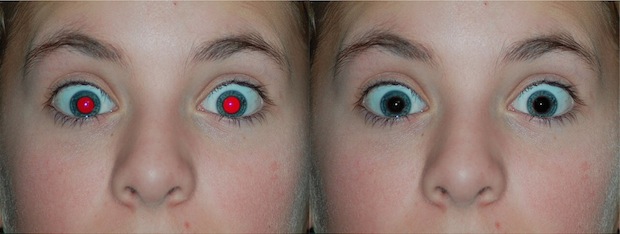
The results of the iOS Photos app native Red Eye Removal Tool are immediate and extremely effective, as shown in this example:
If you want to try out the red eye removal tool yourself but don’t have a picture handy, you can use the same red eye sample image we are in the tutorial courtesy of Wikipedia here. The feature works the same on any iPhone, iPad, or iPod touch.
Note that you can undo the red eye removal at any time as long as the originally edited picture is stored on the iOS device, this is much like applying filters that can also be later removed if desired.
This is really an excellent solution that Apple created, and it doesn’t require any funky tricks, photoshop usage, or third party apps. It’s also preferable to turning the picture into black and white, which is sort of an old fashioned way of handling red eyed images, and with how easy and effect the iOS native red eye tool works, you should aim to use it first.

Can this page be updated to reflect OS8? And maybe explain why sometimes the RedEye tool is available, and sometimes not. Is it dependent on the photo selected? It used to always show.. but not it’s not always there, even though the image is a face?
Wow, it seems amazing. Will give it a try for sure. Thanks for sharing.